Claude's io/ 2002 ZR/ Built thread only...happy io!


thanks
I didn't think of it this way, regarding the dirt getting into it. I never had to complain about the braking power, it is only recently that I think the pad got contaminated with something and it is not as good as it used to be. The disc are not worn out, but new one won't hurt and they don't cost that much....
Definitely more mud and dirt on the way....so plain it will be....thanks for the input.
Is one brand better than another ? or one that I should stay away from ? I think that I will get the one on ebay (above link) same for the bearing.
Happy io
all fixed
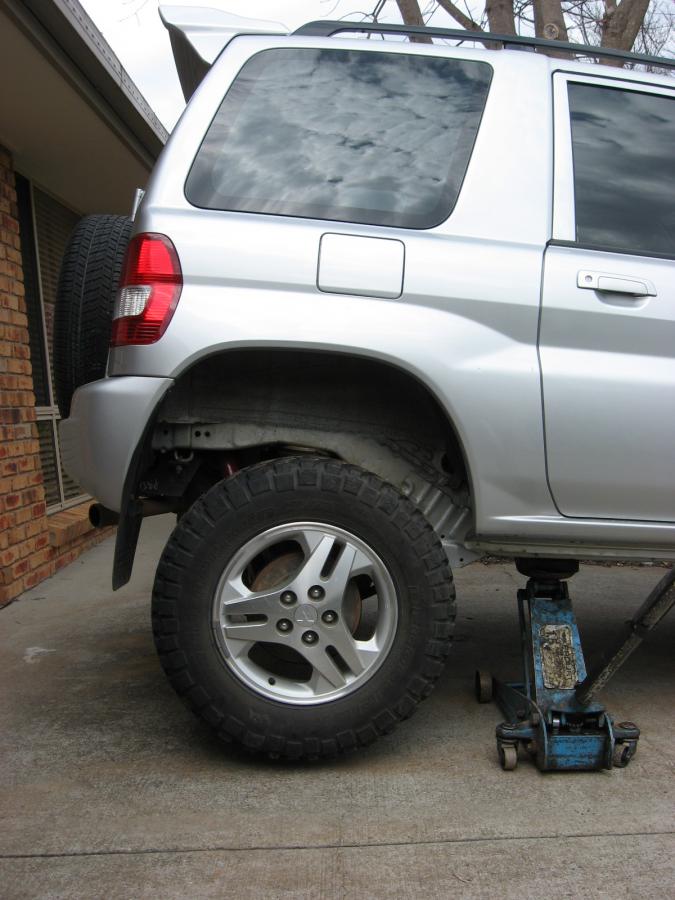
I finished replacing the front bearing, inner CV boot (not sure that the CV itself will last much longer ), new brake pads, new disc, change the brake fluid and serviced the caliper (grease the pin only), and replaced the pillow bearing at the top of my adjustable bearing plate of my strut.
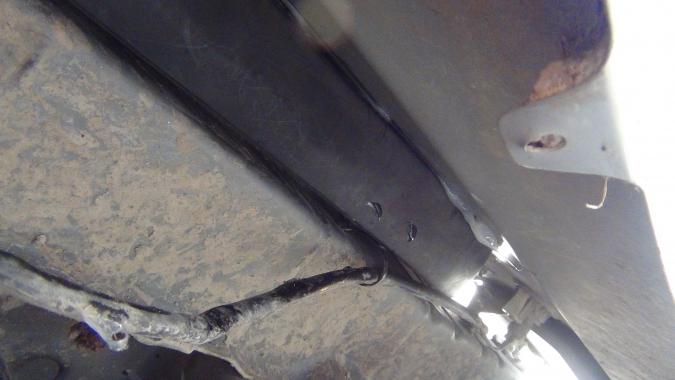
One of my rear shock was noisy, as my car is lifted by around 40 mm, I researched one that is a bit longer without being too stiff. We know that the rear of some hilux have a longer shock. The original shock is around 520 mm by 325 mm. The guy at "supercheap" let me measure the shock he had on the shelf and I found that the "Gabriel" shock ref 81318 is around 580 cm by 350 mm. I bought a set for $100, swapped the lower bush and left the top one as it is and fitted it without sleeve (time will tell if it is ok without the sleeve). My set up allow a maximum of 600 mm before I loose the spring, 580 mm is perfect. I went for a drive and he doesn't seem to be too firm.
Later I want to lift the car a bit more, and I found that "ultima" have a rear shock for the lifted hilux and measure 635 mm by 375 mm, I wanted to buy these and find a way to not loose the rear spring but took the easy way out ....for this time, anyway....
I probably will have to extend the brake hose, they are ...border line now.
I found that my rear brake need adjusting more often that it should, getting loose very quickly. By doing these shock I found that the handbrake cable get pull a fair amount when the wheel is in full extension, that might result in the adjustment getting loose.
Happy io
New "Gabriel" ref 81318.

Wheel at full extension
Edit, this set up, the gabriel with the mazda spring are the best set up you can have and dirt cheap as well. Very happy with them.
bearing
how did you go with the pillow bearing - my parts breakdown shows it as a one-piece with the triangular strut top?!?
I want to replace mine once I replace my struts and am hoping I can just chuck a new pair of bearings in.
They are for my adjustable plate (very easy to do), see post 27, not for the standard top support bearing. I still have the original top support bearing and while I am not sure if it can be removed or not (looks like a sealed unit), the bearing ref number is Koyo 6302-4.
Happy io
Pajero io snokel fitted
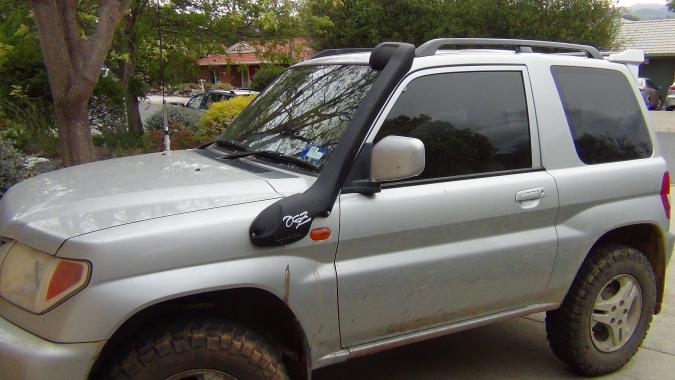
I was waiting to repair a couple of scratches before fitting my snorkel. As time goes by, I have done...nothing, so stuff it !!, got tired to see the snorkel under my bed !! . Please, don't ask how I got the snorkel !!!....long story...should be in post 121.
On the 11, I would have been on this forum for....2 years, posted 1111 times !!
Anyway here is the snorkel fitted....at last...![]()
Under the guard
New air inlet on original filter box

Some silastic inside

Finished connection, plug the original outlet, marine grease on the edges of the air filter (K&N cartridge) to help with the waterproofing.
I might try to find a removable plug for the original air intake, to be able to use the snorkel and the original air intake together (the more air, the better)

Done....beautiful, I am very happy.....![]() View of the air intake.
View of the air intake.

Different view, the snorkel comes with pop rivet to hold it on the guard, I used stainless steel bolt instead. Sorry dirty io :)
Happy io

Gabriel
hey how are the shocks going?
what have you got setup at the front?
Correct me if im wrong but could i put these in the back with some king springs, and put some koni heavy tracks up the front with a pair of kings as well. or would i be better off just buying a full set of konis?
its just that the konis are so expensive...
suspension
Yes Konis are expensive, I didn't go that way because they can be very firm, even on the low setting....May be they aren't, I just didn't want to try.
If money is tight, spacer for the front, new strut from ebay. This is what I have done (post 126 and 128) and kept the original spring. For the rear, mazda spring, and new longer shock (they are fine, just have to play with the bushes).
I am not sure if the "Gabriel" shock can be fitted with the kingspring. The reason is that I think that the kingspring are not as long as the mazda spring. In full extension you might loose the spring. If you get the kingspring, fit them, disconnect the old rear shock, lift your car on the chassis and check when the spring start to move/fall. If the spring is moving before the full length of the Gabriel shock (580 mm)....use another new shock absorber.
My main concern is that the little io is very light, and I do not want a too firm suspension. This said, when you lift the car you must improve the suspension (a bit firmer) to have a stable car at higher speed. This is why the kingspring are firmer, some are very happy with them, some think that they are a bit too firm, hard to please every one !! This said, firmer should be safer at higher speed and have a better braking distance....hard to win every where !!! but it is not comfortable and can be very bouncy while doing some 4x4.....by now you should be even more confused about what to choose :)
It is hard to choose, if you have other io next to you that have done some work, ask to test drive they car.
PM me if you have more questions, as always, I will be happy to help.
Happy io
water tight
Thanks, I remember you saying something about this in the past :) I have checked it (block the air inlet and try to find any sucking noise) and it seems to be waterproof...now ! This kit come from Brazil to fit the original air filter box. I am using my io mostly for the week-end now. . I will make sure to give some feedback regarding the fuel consumption. Later I might even try to put my K&N pod filter back in....
My right CV joint is very noisy (mostly the inner), I have ordered a complete new drive shaft $$$, but I won't go out before replacing it, then I might try to find some... water :)
My orange light for the 4x4 display is flashing too, so I have ordered a new switches....
Happy io.
diff lock switches/UHF relocation
I just fitted a new RHF complete drive shaft....replacement steering rack should be done this week end.
In mean time, I relocated my diff lock switches and my UHF. I found the former location to not be the best, specially for the switches as I could not see them properly.
I found a bigger clock hood in Japan, and I was going to get a new smaller clock and fit the switches next to it. I found that the existing clock box was full of....nothing ! so now this same box is a bit fuller. I fitted my UHF on the top of it, just have to hide the remaining hole next to the UHF to tidy up.
I am not sure if I will leave it as it is, might change later on as I wanted a smaller clock (or no clock) and use an aluminium tread plate to hold everything. That might look better and less cluttered.
I am still not sure where to fit the transceiver holder for the UHF, I don't like damaging the dashboard with screw, I might use velcro tape....
Happy io


steering rack
The fluid level dropped, pump started to make some noise. A small hole was in the left boot, muddy water got in an damaged the seal. When I pull the rack out to change the seal (Mitsubishi told me that I could get parts for it) I found that the mud got in the rack/oil. I then got told by Mitsubishi that internal parts were not available......a new rack cost over $1200. I found a second hand for $250 ,from a 2002 ZR with 125000kms so I gave it a try. The pump is still a bit noisy, no surprise here, I will do something later....rebuilt or new, or second hand, not sure yet....A seal kit for this pump should cost under $50 and a bearing an extra $10/20, worth a try, a new pump should cost a lot more.
Happy io and Merry Christmas to all.


ironman awning
Thanks,
Yes it is nice....why did I waited so long to get one !
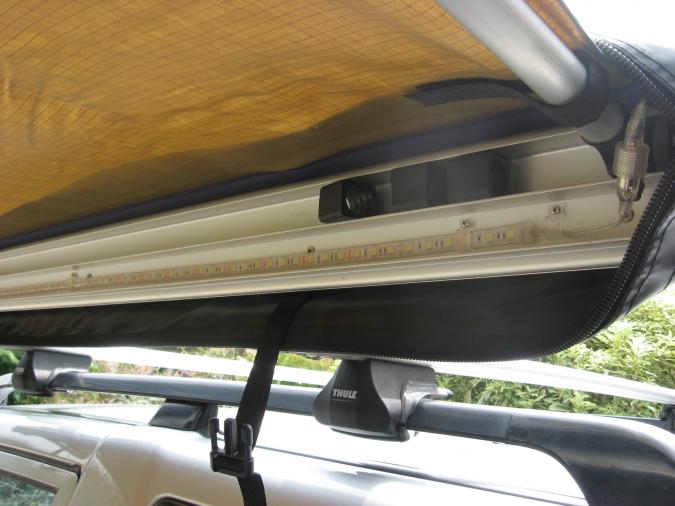
I tried the light yesterday, it is really good and I like the fact that it is neatly packed with the awning but it is very light as well, great design.
I have to check what is his power consumption. I only have one battery. Being LED, I think that it should be fine, but nothing worse than a flat battery in the morning in the middle of nowhere !
Happy io
Simpson preparation
Since my little io was mainly a car to go to work and a week-end toy, going to the Simpson needed some adjustment...
I have been a bit busy trying to get the car ready for a longer trip. Here is a quick list of what I have done. I might give more detail later.
To keep all electronic "toy" and rechargeable light working, I have install 2 USB key, 3 Amps each (3 Amps might be a bit high but smaller do exist). I fitted both outlet in the glove box. Bought on ebay, cheap and will keep thing tidy
http://www.ebay.com.au/itm/151007081034?ssPageName=STRK:MEWNX:IT&_trksid...

I got a pod on the roof and made a platform to hold 4 x 10 litre of fuel. I originaly used 2 bar support the weight. My problem was that all up I would be at 72 kg, these bar are safe to 50 kg (was told), I read in the manual that the roof can hold 100kg. As the north south original bar are not straight fitting a similar bar couldn't work as the space in the middle was too small.
I found a bar that normally fit a 306 Peugeot, and was smaller. While the fixation doesn't perfectly match the profile of the original bar, the height was perfect (50mm, instead of the 60mm of the other bar) and should make the all lot a bit safer.

My home made platform, 3 mm checker plate, with a few fixation point fitted on the frame. With the awning bracket.

The deflector !...cute :)

Since I put the snorkel, the fuel was a touch higher, not much if any really. So I made a "kit" to change the air intake by having the snorkel by itself connected or the snorkel and the original air intake connected. It can be swap quickly. Having this made the fuel a bit better (at least 1/2 litre/100km). Original air intake on the left, plug on the right for using the snorkel only.

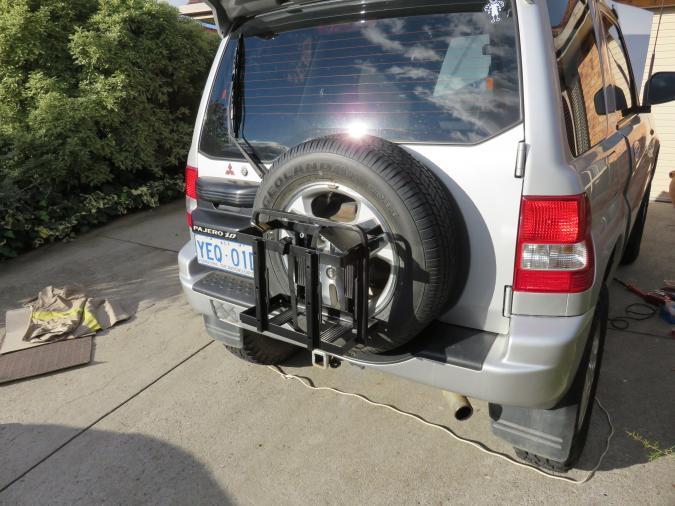
I have installed a 20 litre jerry can holder on the spare wheel, with some rubber to not damage the spare wheel and a couple of bump stop for vibration.
I installed 2 led 5630 strip light in the rear, as the was lighting wasn't the best at all. I am very happy with the result and costed under $10...really bright now, maybe even too much !
I since bought a 5 metre roll to do other project, just cut to size and a couple of smaller soldering. Bought from ebay
http://www.ebay.com.au/itm/141055673595?ssPageName=STRK:MEWNX:IT&_trksid...

The strip light are installed on the top of the rear window, where you have the black paint on the glass....just great ! I fitted a led bulb as well to replace the original light bulb too (lower a bit the drawing power)

I will try to install a small flood light next......more to come.....
Happy io
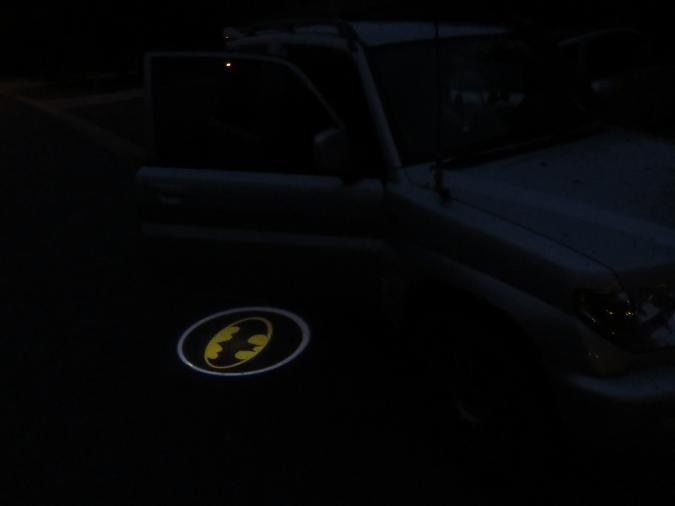
Small 18W led flood light fitted
I just connected a small 18 W LED flood light. I connected it directly on the battery with a waterproof inline fuse. I fitted the switch on the lower right section of the dash, a small red "warning" led have been added next to the dash light adjustment switch.
The light

The switch and the warning led

The light at night

Happy io
Samsung galaxy note 8 dash mount
Ok, thanks to some advices in other thread regarding GPS and maps. That took me a while to choose, not even sure if it is the best, that should be fine....anyway I bought the Samsung galaxy note 8, 4G. This tablet have a GPS built in. I bought "MUDmap" this is mainly a big set of topo map of Australia. I will be able to use internet as well (when available of course, but this tablet have a sim card). Plenty of other application too...can even make a phone call !
To hold it on the dashboard I got a Exomount, but I couldn't fit nicely the suction cup on our dashboard. So, I dismantle my new ExoMount ! to remove the suction cup and after some ....time....I found that I could fit it inside one of the vent, the end bit is bolted inside the vent not just pushed in. Once the tablet is fitted there is a bit of flexing, time will tell if it is fine. This said, the tablet doesn't stop any access to the dash, great location for it.
To have some extra GPS. I have a Garmin Dakota 20 with topo map, too small for using on the road but I bought a new Garmin nuvi 3597 lm and my Garmin topo map work in it....perfect ! The Garmin have a good listing of POI (Place Of Interest) such as petrol station, food, hotel, shop....that could be useful on the road (I know, not in the desert !)
I will take all paper map too.
I don't have much experience with GPS but I shouldn't get lost...
A friend lend me a sat phone.
What it looks like on the dashboard (sorry the sun is just in front)

Happy io
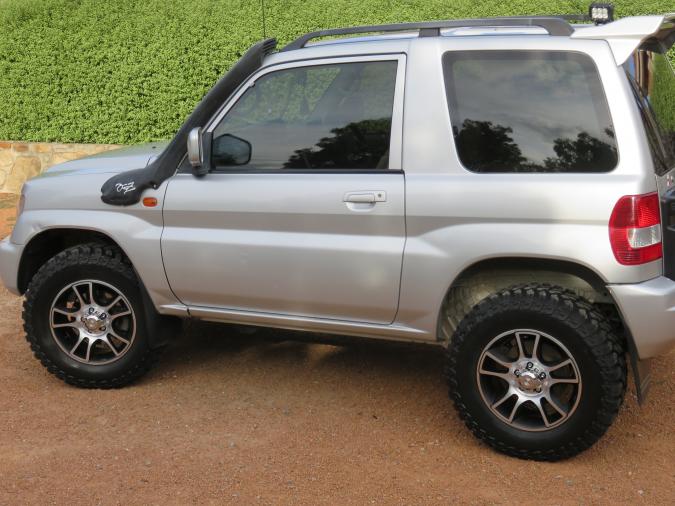
Maxxis Bighorn MT 764 with new wheels
While I was very happy with my 225/75/16 KM2 I wanted to try something a bit different, a bit wider. I just got 4 new 245/70/16 Maxxis Bighorn MT 764 fitted on a set of new 7 inches wheel. Only time will tell if it is a good move or not but so far I like the look of the new wheels.

These wheel are from Kings wheel, they call them "Cobra"

Happy io
LED strip
The strip light are installed on the top of the rear window, where you have the black paint on the glass....just great ! I fitted a led bulb as well to replace the original light bulb too (lower a bit the drawing power)
How does the strip works? Once you open the rear door, it turns on or is it constantly on?
Reply: it work the same as the rear door light.

light and fuel
Sorry, I didn't take the time to explain these mod.
Red_Daug, the led strip are connected to the rear internal roof light switch in parallel with the light bulb, so they work the same as the rear light, with the door or I can turn them on and off when I want. They are great and so cheap, great great value if you need extra light at the back.
Madmax, yes these tyres and new wheels look great, I am very happy. I will post a bit more about them a bit later, as a comparison to the 225/75/16 km2.
The jerican fuel holder came from "supercheap" shop. I did put some rubber strip where it is in contact with the spare rim. I did cut some rectangle pieces of steel on which I welded some nuts to put at the rear of the rim. I had the 3 spokes wheels at the time and the nuts was between the spoke, the rectangle plate hold the nut in place and stopped it from rotating at the back of the wheel. I cutted some small metal tube to fit between the nut and the jerican holder. While it didn't move, they filled up the jerican too much before entering the Simpson and my "cheap" jerican expanded and did bend the holder (the section that doesn't touch the spare rim) This said nothing moved but I am not sure that this holder will last for a very long time as the metal is thin and the welding don't look that strong.
When I done my trip, my idea was to empy the jerican from my roof rack first (I was concern about the weight on it), but I choose to empty half the the one on the rear door first. It might be better to spend a bit more and get something solid, I saw some at BCF shop too. I can put some pictures if needed.
Happy io

Km2 against Maxxis Bighorn 764
Time for my new tyre report.
I have these 245/70/16 Maxxis Bighorn 764 on my car since a few month. These tyres are about 30 mm wider than my former 225/75/16.
I thought that I would share my view on them, this is only what I think and you might not agree :) and the difference in size would impact on those result. If KM2 would have made the 245/70/16 I would have bought those at the time.
The good first.
The Maxxis look better !!!
Their sidewall are not as strong as the KM2 but considering the weight of our io they should be fine and still offer very good sidewall and puncture protection. Because of this the ride is much more comfortable.
The grip on yet road is better than the KM2.
The grip on gravel road, dry rocky and gravel 4x4 is a bit better.
Fuel is a bit better (about a bit under 0.5 l/100kms), I am the first surprised here and I thought that it would be the other way around.
The not so good
They don't fit on the original rim, too wide, wrong offset. I guess new rim can be good :) but more $$
The tyre being wider, it doesn't fit as nicely as the 225/75/16, they once in a while touch the front mud flap when turning. Not much at all, and not if the mud flap are in good condition, mine are a bit bend !! and it is just a bit of noise...
The Maxxis is not as good in the mud than the Km2. The Km2 is still king here.
The neutral
While the Maxxis have a bit bigger diameter about 5mm from memory, I haven't felt a difference, and the speedo is still perfect. I have fitted a kit to adjust the speedo in the past, didn't need any adjustment. This was check with my GPS.
What do I prefer ??
Hard one really. I really like that it is a bit more comfortable, better on wet road but it would have been even better if the Maxxis would have been as good in the mud than the Km2....isn't is why we buy muddies in the first place ??
Happy io
Low gearing 2.85 fitted
This have been a bit of a challenge, few mistakes (some expensive, too me at least!) and some adjustment along the way but my car is now fitted with low gearing with a ratio of 2.85.
Please, don't fill my built thread with too many question but feel free to check the link below that I will be building in the next few day explaining the unique way of how I have done it. At this stage all is working fine but it is early day and I considere it to be still at the testing level, reliability included.
And yes, I am very happy to have made it to this point :):)
http://pajerio.com/forum/pajero-io-fitted-low-gearing-285
Happy io
Pajero io winch fitted
I have been wanted to fit a front winch for a while. Choosing a winch wasn't easy as they go from 4500 lbs straight to 9500 lbs very little in the middle or they are as heavy as the 9500 lbs. The more I search on internet the less I would find something. Then "Supercheap" got their 9500 lbs winch at 50% off, and with mostly good report on internet about them, bugger it, at around $350 that will be it.
The winch came with a cable, I bought 30 metre of dyneema 10mm SK75 on ebay for $125 and sold the cable for $80, this made the winch at 17.6 kg, I estimate the rope to be under 3 kg.
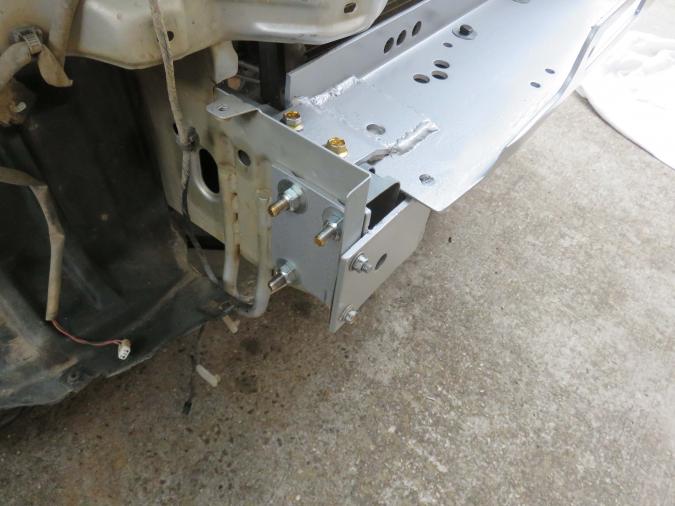
Building a full front bar might have been a bit on the heavy side and after a few exchange of email with Bob, he send me this picture
This bar is a "universal" winch plate.

The following pictures are not in chronological order but it was easier to explain this way.
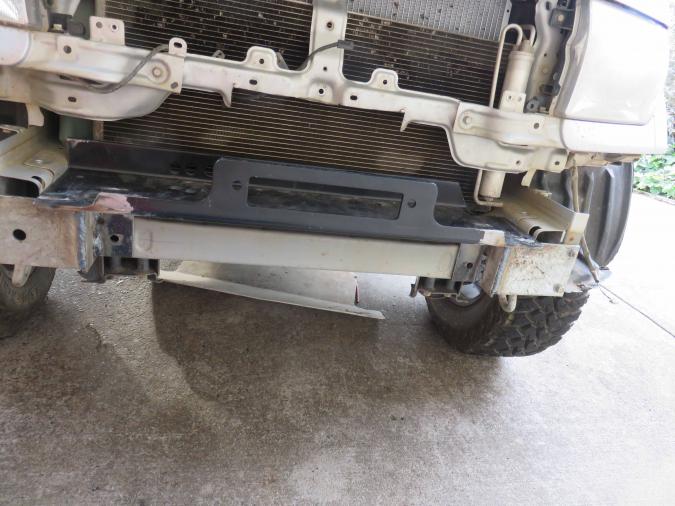
Seeing this was my starting point, I would try to fit the winch behind the bumper bar. I stripped the front of my car, found a new unused winch plate on gumtree (6mm thick) for $50. and after cutting the side of it, it fitted perfectly on the top rail, too easy I thought. But once the winch was on it, it was about 3 cm to high and the front corner of the plate would be too big as well to be able to put the bumper.
At this stage, I didn't have a clear plan on what to do, so I choose to just push along and making up and adjusting as it goes....
This is the plate moved as far back in as I could with trimmed corner, and I made some bracket to use the existing fixation, and I also trimmed the horizontal bar just above the plate.

More cutting, more welding, and an upset grinder choose to have a got at me and grabbed my shirt at the bottom and quickly went up, ending up under my arm luckily only giving me a bad large bruise.....and yes the shirt was not tear up before.

And here is the bar finished. Weighted at 14.6 kg


Fitting the bolt on the lower section, I made a hole in the middle and used wire to guide the bolt, this was a bit hard as there is some partition in the rail !


I cut some square tube to fit under between the winch plate and the bar just under

I fitted some crush, made with old rear diff bushes !


I shortened the support of that horizontal bar above the plate

But ....the last meter of the winch rope was just touching it so I modified it


Made some plate to match the "rib" on the side of the chassis rail, the plate in my hand is for the other side

All bolted, the winch plate fit very tight and needed to be fitted both side at the same time or it would go in an angle and get stuck
Now the cables....as I was going to fit the solenoid further than what is required, all the cable supplied are 35 square mm and after some internet reading and this thread http://pajerio.com/forum/winch-help-electrical-cable
I choose to upgrade all the cable with 50 square mm, when searching for new cable they were around $20/m and I estimated at the time that I would need a bit under 5 m, not the end of the world but a visit to the metal recycling got me my 5 m for $20....always good to recycle :)
Making of the new cable with new terminal, properly crimp

Using waterproof heat shrink tubing

The original and mine....

Trying to find the best possible place for the cable took a while as there isn't much room.

Here, following the advice of Bob and Fordem, I located the solenoid on the strut tower.

Making a nice harness to protect the cable

Making a support to hold the solenoid with metal plate, we have 3 unused holes with nuts behind on the strut tower (at least something easy)....more cutting, grinding....welding....


All cables and solenoid fitted. The cable pass under the battery tray, I had to cut a bit under it and rounder the edges. The red cable will get spit tubing as well.

I removed the winch and open it to check if it had enough grease, and added a little more.
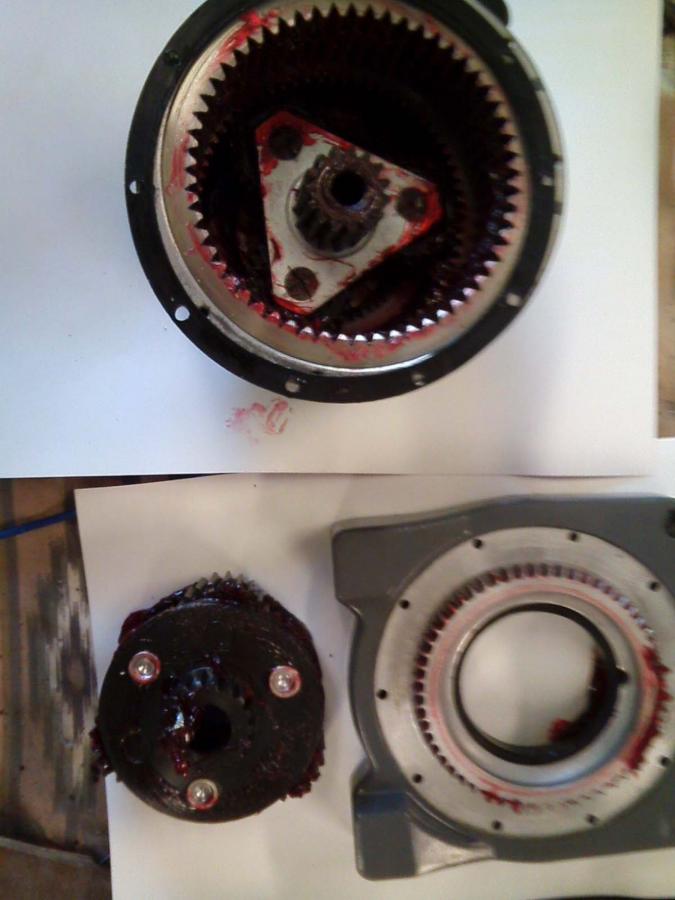
Added some sealant

Fitted the bumper back on and made access to the gearbox, to engage or disengage the winch

Making an opening to fit the fairlead. I had to buy a fairlead to suit the rope, this was found on gumtree for $20, and they are lighter as well than the original roller system.

From here I had 2 choices, fit the fairlead directly on the bar (as it should be I guess) and make a nice offset box or make some spacer and fit the fairlead at the level of the bumper. I choose the latest because I could very easily change it to the first choice if needed but if I were to do the first choice, I then couldn't change as the bumper would have been cut a lot more.
Making the spacer with nylon rod


Fairlead fitted with longer bolt, I glued some rubber strip to the edge to look neat. I will make a bracket to hold the upper middle section of the bumper to make it look straight

This as been tested once, and it pull the io on one meter with my foot fully on the brake....very impressive, I now have burn out mark in front of my place :)
I am not an engineer, I hope that it is strong enough but only time will tell.
What need to be done now
I still have to make some type of flip system for the number plate, connect the plug-in system inside the car, my battery is already a heady duty with 525 cca and 100mn rc but will be replaced with a AGM battery 750 cca 120 mn rc with new terminal to properly feed the winch. I also have to change the fixation of my bash plate as the front bolt were fitted on the front bar that have been removed to make room for the winch plate ( weight that have been removed at the same time !)
Happy io
winch
Thanks,
At first I wanted to fit the solenoid in an electrical junction box, but I didn't find something that would be compact enough to fit in that spot. The next idea was to have an isolator switch, again space is a bit short and those can fail too. So I will fit the main positive feed on the battery terminal with a wing nut and it will be connected during 4x4 trip and disconnected at other time. This will able me to quickly disconnect the winch in case of emergency. This said, I will cover those terminal to stay on the safe side, as you said a spanner there will make a few sparks !
Happy io
winch
Now thats another impressive piece of work Claude, looking great, just wish you will never need it LOL
Thanks, I would like to take that car to Cape York and I think this will be very much needed there. Another good use is to help other, snatch strap do work but can be a bit hard on the tow bar (the 2 door is not at strong as the 5 door one) and it is a lot smoother to use the winch IMO
Happy io
New carling switches
My old compressor and rear diff lock switches had their cover broken. Since I now have the front winch, I thought I will connect a couple of switches to control it without the need of the remote. The remote can still be used. I used an isolator and a "in and out" switches. The switch isolator is mainly to not have the winch working if I touch it's switch by accident while cleaning or other. The winch is connected in a way that doesn't required the ignition key to by used.
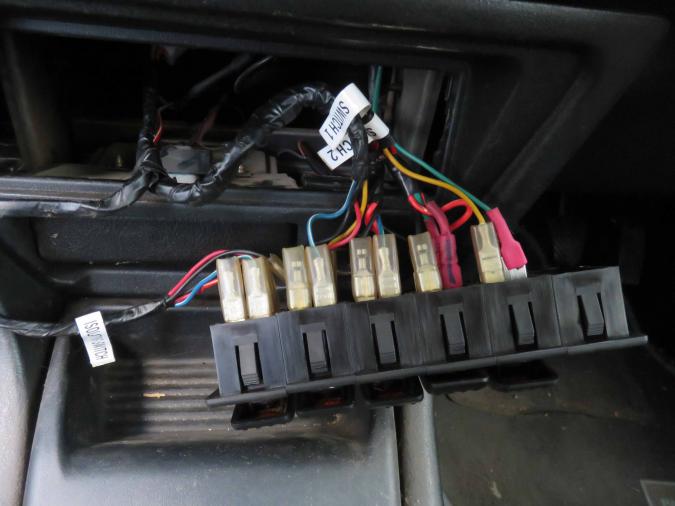
I bought a set of new switches with their casing. I thought that the compressor and diff lock switches will be a straight swap, take the old one out put the new one in.....NO no such luck, the original ARB have 5 pins, the new one have ....4....bugger !! I have managed to understand what does what and done the swap.
Since my electrical is now having a bit more switches, I fitted them together in a case that you can buy to suit the carling switches, these case are like lego block and you can make them to suit different number of switches. Having the old compressor and diff lock switches next to the clock worked well but I found that once you remove the little box under the heater control, the height is PERFECT for the switches case...at least an easy one ! So I swapped location of my cables, made some new one for the winch switches and while it is not fully finished, everything works....![]()
I also bought a new battery, ....here goes an optima yellow top D34 8012-254 with 765 cca and 55 Ah, hopefully that should be fine.
Yes I know, the one on the right is not fully connected ...yet !
Cute....!! I will have to buy a cover and "fill up" the side to make it clean, but they hold perfectly.

The new battery, I still have to fit new terminal, that I bought to able me to quicly remove the positive of the winch with a wing nut.

Some tidy up, just have to protect the positive terminal on the solenoid....before I put a spanner on it (as kindly mentionned by Fordem)

And yes the winch is working well :)
Happy io


lol
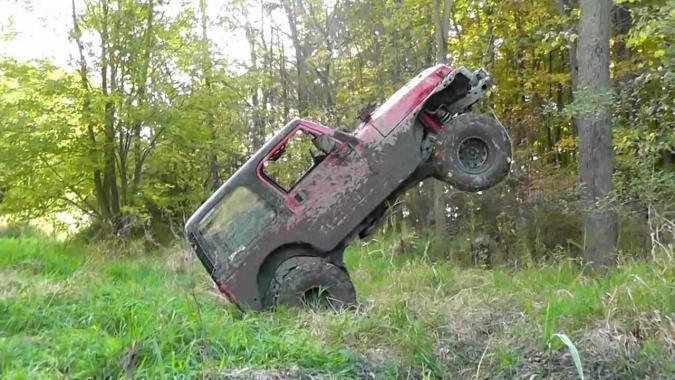
Lol...funny, both of you![]() ....yes agree it is overkill. If I have to pull a Lancruiser out of a bog hole, I will need to attach the rear of my car to a tree first, then I will probably have the first stretched io.... lol...
....yes agree it is overkill. If I have to pull a Lancruiser out of a bog hole, I will need to attach the rear of my car to a tree first, then I will probably have the first stretched io.... lol...
When searching for a winch on ebay, they have simply over 5000 choices ! I kind of got lost in the middle ! You have what looks like a too light 4500lbs, a few 6000lbs (under 10 on ebay). The 6000lbs would have been good for the io but they are as big as some 9500lbs....then "Supercheap" had them at half price......it made my choice easy....
I have to admit that I may have been a bit lucky that it fit that well behind the bumper....
And stop pulling my leg....I am the one with the pulling power ![]()
![]()
Happy io
You don't want them in my experience
If you go back to the mud, it will stick in the holes and slots and wear your pads super quick.
From a dirt biking point of view, brake pads always need replacing after a mud ride, and a lot of enduro riders swap their rear vented disc to a solid disc to preserve the pads.
Size is not important; it's how you use it that matters!